Old Air Products systems offer complete climate control solutions, easily installed with basic tools and a 1-1/4” hole saw, ensuring peak cooling performance.
Installation guides, like CAP-7100 (Dec 2017) and 71-CAP-1165M (Aug 2007), detail a neat, clean installation process for classic vehicles.
Overview of Old Air Products Systems
Old Air Products delivers comprehensive air conditioning solutions for classic cars and trucks, prioritizing both performance and ease of installation. These systems include condensers, compressors, evaporators, and necessary fittings.
Designed for vehicles like the 1968-1977 Corvette and 1967 Ford F100, they aim for a clean appearance and maximum cooling. Dual evaporator systems, like the IP-2005T, cater to larger vehicles, offering enhanced climate control.
Importance of Following Installation Instructions
Adhering to Old Air Products’ installation manuals – CAP-7100 and 71-CAP-1165M – is crucial for optimal system performance and longevity. Correct installation ensures efficient heat removal, maximizing cooling efficiency.
Proper hose routing, secure mounting, and accurate electrical connections prevent leaks and operational issues. Following these guides guarantees a neat, clean installation and avoids potential troubleshooting headaches down the road.
Tools and Materials Required
Essential tools include basic mechanic sets and a 1-1/4” hole saw for mounting. Refrigerant hoses, fittings, and potentially electric fans are also necessary.
Basic Mechanic Tools
A standard mechanic’s toolset is sufficient for most of the installation process. This includes wrenches, sockets, screwdrivers, and pliers, enabling secure mounting of components.
These tools facilitate removing the radiator and grille, attaching brackets, and connecting hoses. Having quality tools ensures a smooth and efficient installation of the Old Air Products system.
Specific Tools: 1-1/4 Hole Saw
A crucial specialized tool is the 1-1/4 inch hole saw, essential for creating necessary access points during installation. This tool is specifically mentioned in installation guides like 71-CAP-1165M (Aug 2007).
It’s used for drilling holes for hose routing and component mounting, ensuring a secure and professional fit for the Old Air Products air conditioning system.
Refrigerant Hoses and Fittings
Proper connection of refrigerant hoses and fittings is vital for system performance and preventing leaks. Old Air Products compressors feature mounting ears strategically positioned for optimal hose routing.
Careful attention to fitting tightness and hose alignment ensures a neat, clean appearance, maximizing cooling efficiency as outlined in installation documentation like CAP-7100 (Dec 2017).

Preparation Before Installation
Prior to installation, remove the radiator and grille for condenser access. Inspect existing mounting holes and prepare for insulation to maximize cooling efficiency.
Vehicle Preparation: Removing Radiator and Grille
Before beginning the Old Air Products installation, complete removal of the vehicle’s existing radiator and grille is essential. This provides unobstructed access for installing the condenser, a crucial component of the cooling system.
Carefully disconnect all hoses and electrical connections before removal. Ensure proper support is in place to prevent damage during the process, facilitating a smooth installation.
Checking Existing Holes for Mounting
Prior to mounting the Old Air Products compressor, thoroughly inspect the engine for pre-existing mounting holes. Specifically, on Ford F100s, the driver-side bracket utilizes factory holes in the cylinder head.
Confirming compatibility with these existing points simplifies installation and ensures a secure fit, minimizing the need for drilling or modification, and maintaining structural integrity.
Insulation and Sealing
Maximizing cooling efficiency requires diligent insulation and sealing. Old Air Products recommends insulating the roof, firewall, and floorboards to prevent heat intrusion.
Critically, seal all holes in the firewall to block external heat sources and maintain the conditioned air within the vehicle’s cabin, contributing to optimal performance and comfort.
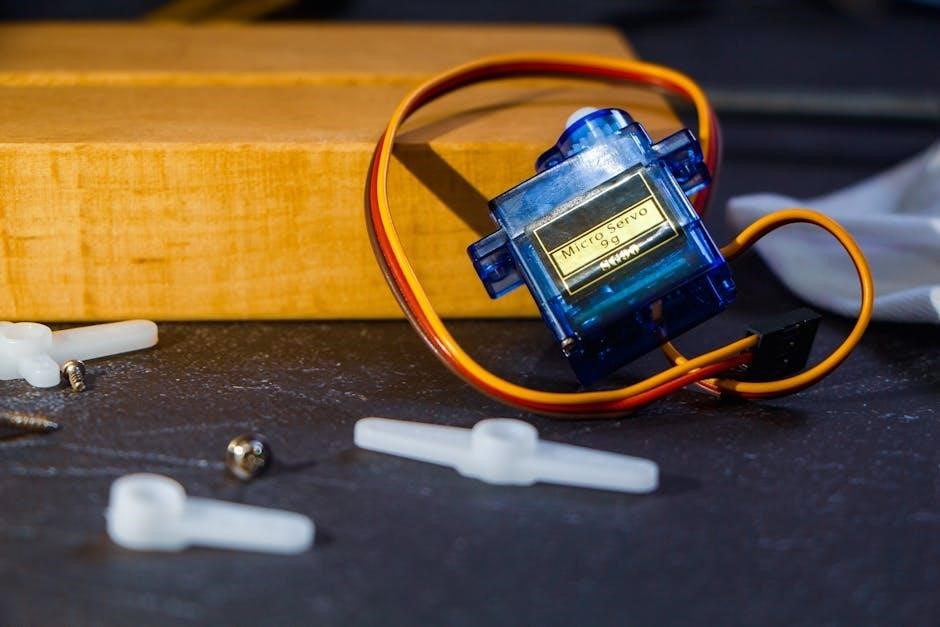
Compressor Installation
For V8 engines, the A/C compressor mounts on the passenger side, simplifying hose routing and ensuring a neat, clean installation appearance.
Mounting utilizes existing holes, and the four compressor ears allow optimal hose fitting positioning.
Mounting Bracket Location (V8 Engines)
Old Air Products specifies that for vehicles equipped with V8 engines, the A/C compressor mounting bracket conveniently bolts directly to existing holes located on the left bank cylinder head.
This design choice eliminates the need for drilling, simplifying the installation process significantly. Positioning the compressor on the passenger side optimizes hose routing, contributing to a cleaner and more efficient system layout, enhancing overall performance and aesthetics.
Compressor Mounting Ears and Hose Routing
Old Air Products compressors feature four mounting ears, allowing for versatile positioning. During installation, installers should strategically select the two ears that best position the refrigerant hose fittings towards the top.
This configuration facilitates optimal hose routing, minimizing bends and ensuring a neat, clean appearance. Careful ear selection contributes to efficient refrigerant flow and overall system performance.
Driver-Side Mounting Bracket (Ford F100)
For 1967 Ford F100 installations, the Old Air Products AC compressor mounting bracket conveniently bolts directly into pre-existing holes located on the left bank cylinder head.
This simplifies the installation process, eliminating the need for drilling or fabrication. Utilizing existing mounting points ensures a secure and reliable attachment for the compressor, streamlining the setup.

Condenser Installation
Condenser installation requires removing the radiator and grille for proper positioning. Old Air Products offers high-quality electric radiator and condenser fans for optimal cooling.
Positioning the Condenser
Proper condenser positioning is crucial for efficient heat exchange. The installation process necessitates the removal of the vehicle’s existing radiator and grille to facilitate correct placement.
Ensure the condenser is securely mounted, allowing unobstructed airflow. This maximizes cooling capacity and contributes to the overall performance of the Old Air Products system, delivering superior climate control.
Electric Radiator and Condenser Fans
Old Air Products offers high-quality electric radiator and condenser fans as essential components for optimal cooling. These fans enhance airflow through both the radiator and condenser, significantly improving heat dissipation.
Utilizing these electric fans is particularly beneficial for vehicles where engine space is limited, ensuring efficient and reliable air conditioning performance in various driving conditions.
Evaporator Installation
Old Air Products offers evaporator units like the Hurricane Rear Aux A/C (IP-2005T) for larger vehicles, and supports dual evaporator system installations for enhanced cooling.
Hurricane Rear Aux A/C Unit (IP-2005T)
Old Air Products’ Hurricane Rear Auxiliary A/C Unit (IP-2005T) is designed for larger vehicles needing supplemental cooling. This unit provides comfort to rear passengers, enhancing the overall driving experience.
The installation manual provides essential information regarding operation and maintenance. Proper installation ensures optimal performance and longevity of the auxiliary cooling system, delivering consistent comfort.
Dual Evaporator Systems
Old Air Products offers dual evaporator systems for vehicles requiring maximum cooling capacity. These systems utilize two evaporators to efficiently remove heat, providing superior comfort for both front and rear occupants.
Installation requires careful attention to refrigerant lines and electrical connections. Proper balancing of airflow between evaporators is crucial for optimal performance and consistent temperature distribution throughout the vehicle.

Hose Connections and Routing
Refrigerant hoses must be securely connected, ensuring a neat and clean appearance. Proper routing prevents kinks and abrasion, maximizing system efficiency and longevity.
Connecting Refrigerant Hoses
Carefully connect the refrigerant hoses to the compressor, condenser, evaporator, and other system components, ensuring each connection is tight and leak-free. Position the compressor mounting ears strategically to facilitate optimal hose routing, keeping fittings at the top for easier access.
Double-check all fittings for proper seating and torque specifications to prevent refrigerant loss and maintain system performance. A clean, organized hose layout is crucial for both aesthetics and functionality.
Ensuring Neat and Clean Appearance
Old Air Products emphasizes a neat and clean installation for both aesthetics and optimal performance. Route hoses carefully, avoiding sharp bends or contact with hot engine parts. Secure hoses with clamps or ties to prevent movement and maintain a professional look.
Proper organization enhances accessibility for future maintenance and troubleshooting. A well-executed installation contributes to the overall value and enjoyment of your classic vehicle.

Electrical Connections
Wiring the system requires careful attention to detail; connect fan control wiring per instructions for proper operation. Ensure secure connections and utilize appropriate gauge wire.
Wiring the System
Carefully connect all electrical components according to the provided wiring diagrams in the installation manual (CAP-7100). Proper grounding is crucial for optimal system performance and safety. Double-check all connections before applying power, ensuring wires are securely fastened and insulated.
Incorrect wiring can lead to system malfunction or damage, so meticulous attention to detail is paramount during this step of the installation process.
Fan Control Wiring
Old Air Products offers high-quality electric radiator and condenser fans, requiring dedicated wiring for effective operation. Connect fan control wiring per the CAP-7100 instructions, utilizing a relay to manage the fan’s power draw and protect the vehicle’s electrical system.
Ensure proper fan activation based on condenser pressure or thermostat settings for optimal cooling efficiency and consistent climate control within the vehicle.
System Charging and Testing
Proper refrigerant charging is crucial for optimal performance. Follow the procedures outlined in the installation manual to achieve the correct pressures and ensure effective cooling.
Thorough performance testing verifies system operation and identifies potential issues.
Refrigerant Charging Procedures
Accurate refrigerant charging is paramount for system efficiency and longevity. Consult the Old Air Products installation manual (CAP-7100) for specific refrigerant type and quantity recommendations.
Connect manifold gauges, evacuate the system to remove air and moisture, and carefully introduce refrigerant according to the specified pressure guidelines. Monitor pressures during charging to avoid over or underfilling.
Performance Testing
Post-charge performance testing verifies the system’s cooling capacity. Utilize manifold gauges to confirm proper suction and discharge pressures while the vehicle is operating.
Measure vent temperatures to assess airflow and cooling effectiveness. Address any discrepancies by checking refrigerant levels, compressor operation, and component functionality, ensuring optimal system performance.
Troubleshooting Common Issues
Common issues include refrigerant leaks and compressor malfunctions. Leak detection is crucial, alongside verifying proper compressor operation for optimal cooling performance.
Leak Detection
Identifying refrigerant leaks is paramount for system efficiency. Technicians employ electronic leak detectors or utilize a soap bubble solution around fittings and connections.
Carefully inspect hose connections, compressor seals, and condenser/evaporator cores. Addressing leaks promptly prevents performance degradation and ensures the longevity of the Old Air Products system.
Compressor Operation Problems
Troubleshooting compressor issues involves verifying proper electrical connections and refrigerant charge. A failing compressor may exhibit unusual noises or fail to engage the clutch.
Ensure the mounting bracket is secure and hose routing isn’t causing strain. Insufficient refrigerant or a blocked orifice tube can also mimic compressor failure, requiring further diagnosis.

Maximizing Cooling Efficiency
To boost cooling, tint windows, insulate the firewall and floorboards, and seal all firewall openings—crucial steps for optimal heat removal from the vehicle.
Window Tinting
Applying window tint significantly reduces solar heat gain inside the vehicle, lessening the load on the air conditioning system. This simple modification allows the Old Air Products system to operate more efficiently, maintaining cooler temperatures with less compressor runtime.
Tinting helps achieve maximum cooling, as a key principle is removing heat faster than it enters. Consider professional installation for optimal results and legal compliance.
Firewall and Floorboard Insulation
Insulating the firewall and floorboards minimizes heat transfer from the engine compartment and road, crucial for efficient cooling. Sealing all holes in the firewall prevents hot air intrusion, further enhancing the system’s performance.
These steps, recommended by Old Air Products, reduce the cooling load, allowing the AC to maintain comfortable temperatures more effectively and maximizing overall efficiency.
Safety Precautions
Handle refrigerant with care, following all safety guidelines. Ensure electrical connections are secure and properly insulated to prevent hazards during installation.
Handling Refrigerant
Refrigerant requires careful handling due to potential hazards. Always wear appropriate safety glasses and gloves when working with refrigerant lines or the system. Avoid releasing refrigerant into the atmosphere; proper recovery and disposal methods are crucial.
Ensure the work area is well-ventilated, and familiarize yourself with the refrigerant type used in your Old Air Products system before beginning installation or service.
Electrical Safety
Electrical connections are vital for system operation; disconnect the vehicle’s battery before starting any wiring. Use properly sized wiring and connectors, ensuring secure connections to prevent shorts or fires.
Follow the wiring diagrams provided in the installation manual carefully, paying attention to fan control wiring. Double-check all connections before reconnecting the battery and testing the system.
Understanding the Installation Manual
Old Air Products provides detailed manuals like CAP-7100 (Dec 2017) and 71-CAP-1165M (Aug 2007), crucial for a successful and correct installation process.
CAP-7100 Installation Instructions (December 2017)
Old Air Products’ CAP-7100 instructions, dated December 2017, comprehensively cover system component placement, focusing on the compressor’s position for easier hose routing and a cleaner aesthetic.
The manual details mounting procedures and suggests utilizing high-quality electric radiator and condenser fans, available directly from Old Air Products, to maximize cooling efficiency.
71-CAP-1165M Instruction Sheet (August 2007)
Old Air Products’ August 2007 sheet, 71-CAP-1165M, emphasizes the system’s straightforward installation using common mechanic tools alongside a 1-1/4” hole saw for a professional finish.
It highlights achieving maximum cooling through window tinting, insulation of the firewall and floorboards, and sealing any firewall openings, alongside component replacement.
Corvette Hurricane System Installation
Old Air Products’ Corvette Hurricane System (1968-1977) features detailed instructions, diagrams, and photos for air conditioning and defroster installation.
This specialized kit ensures a proper fit and optimal cooling performance for classic Corvette models.
Specific Instructions for 1968-1977 Corvettes
Old Air Products provides a comprehensive installation guide specifically tailored for 1968-1977 Corvettes. This document details step-by-step procedures, ensuring a seamless integration of the Hurricane system into these classic vehicles.
The guide includes detailed diagrams and photographs illustrating component placement and connection points, simplifying the installation process for both experienced mechanics and DIY enthusiasts. Careful adherence to these instructions guarantees optimal performance and a factory-like finish.

Post-Installation Maintenance
Regular system checks and filter replacements are crucial for sustained performance. Maintaining your Old Air Products system ensures years of reliable cooling comfort.
Regular System Checks
Consistent monitoring of your Old Air Products system is vital for longevity. Periodically inspect refrigerant hoses for leaks and ensure all connections remain secure. Verify proper compressor operation and fan functionality.
Check for unusual noises or reduced cooling capacity, indicating potential issues. Proactive checks prevent minor problems from escalating into costly repairs, maintaining optimal performance and comfort.
Filter Replacement
Regular filter replacement is crucial for maintaining air quality and system efficiency within your Old Air Products installation. A clogged filter restricts airflow, reducing cooling performance and potentially damaging the evaporator.
Inspect and replace filters according to the manufacturer’s recommendations, typically every season or more frequently in dusty environments, ensuring optimal operation and longevity.